When inspecting a new or used RV, there are so many important things to look for during the RV inspection. Does the roof leak, how is the engine and is there signs of moisture intrusion among many others. After watching a home inspection video, I decided to try out the Flir handheld Infrared camera to aid me with my RV inspections. According to Flir, an IR camera can pick up infrared energy as heat, transform the energy into an electronic signal, which can then produce an image. The camera’s small, digital screen shows the object in question using a range of colors, each shade representing a different temperature range. For example, reds, yellows, and oranges typically represent warmer temperatures. Colors toward the bluer end of the spectrum usually represent colder temperatures. Many modern thermal imaging cameras let you choose your own color scheme, too. In higher-quality cameras, you can home in on temperature ranges with great precision. And some companies now have thermal cameras as add-ons for a mobile device. Infrared (thermal imaging) is an advanced, non-invasive technology that allows the inspector to show clients things about their RV that can’t be revealed using conventional inspection methods. Handheld thermal imaging cameras for RV inspections can detect a wide array of issues in a cost-effective manner.
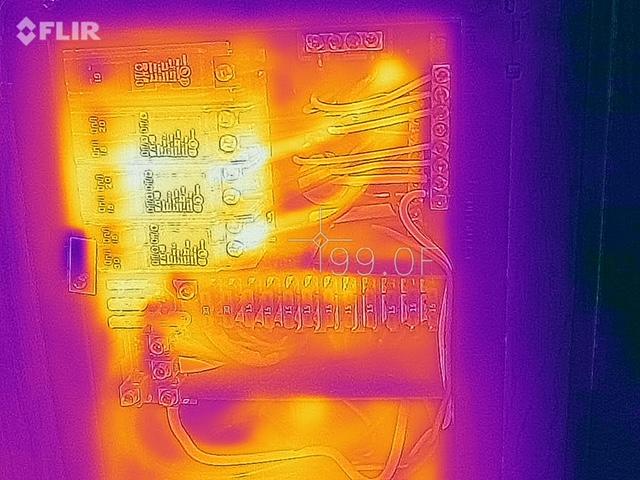
Detecting lose wires in the Electrical panel
RVs are equipped with all the conveniences of home. The electrical systems are both AC and DC circuits that power inverters and converters among many other things. During the inspection process, The inspector is tasked with evaluating all electrical systems. Deficiencies within the electrical system can be made visually apparent by use of an infrared camera. For example, a deficient connection between electrical components can result in resistance which will manifest in an apparent temperature elevation when compared with similar types of connections under similar load conditions. The Flair Infrared Camera helps the inspector by locating hot points in the circuit. Hot points indicate lose connections and or bad circuits.
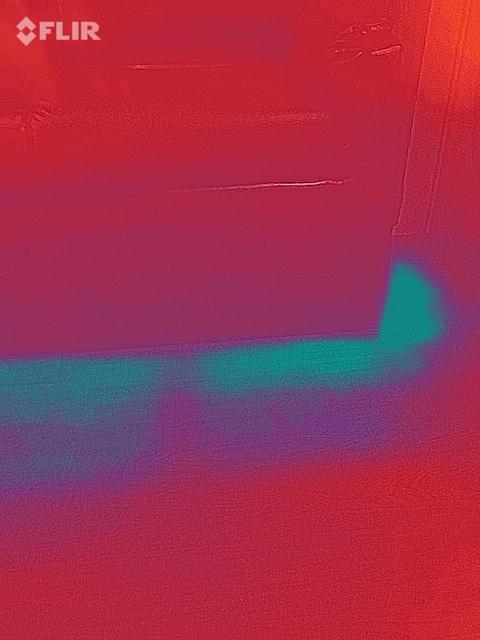
Detecting moisture inside the RV
Water leaks can be a serious two-fold issue. For one, water leaks can lead to structural integrity issues in roofs, floors, which in turn can lead to costly repairs. Water leaks & moisture can also be particularly hazardous to your family’s health because they can foster the perfect environment for molds to grow unchecked. Molds can be an allergen that causes irritations in individuals as small as a runny nose or as fatal as Anaphylaxis. Water leaks and mold should be dealt with in an expedient manner. Infrared cameras can be used to quickly determine whether water stains are active or not. This isn’t a definitive test for moisture, but when a ceiling is all the same temperature, it’s highly unlikely that the ceiling is wet. During an RV inspection, the infrared camera is used to locate potential moisture areas and then that area is probed with a moisture meter extensively to determine if the area is wet.
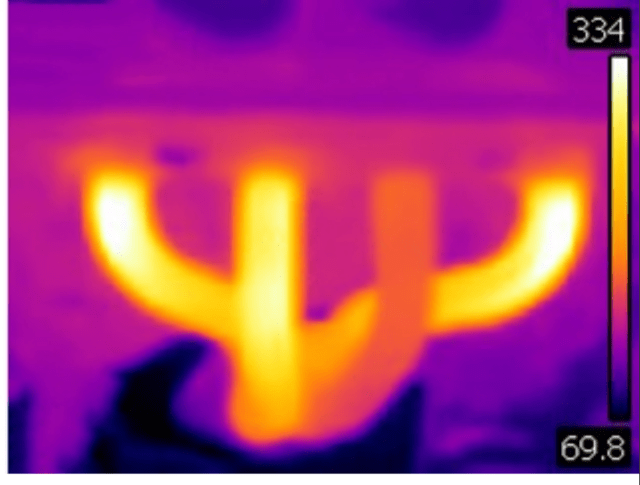
Thermal Camera for Engine diagnostics
In addition to fluid analysis. Infrared technology is a helpful tool to aid in RV engine diagnostics. Here at RVinspections.com, we use IR technology to look for hot and cold spots in the radiator, is the oil leaking and from what origin and are there temperature differences in cylinders. We also look at cables and hoses for excessive heat and we can also check to make sure the heated mirror function is working.
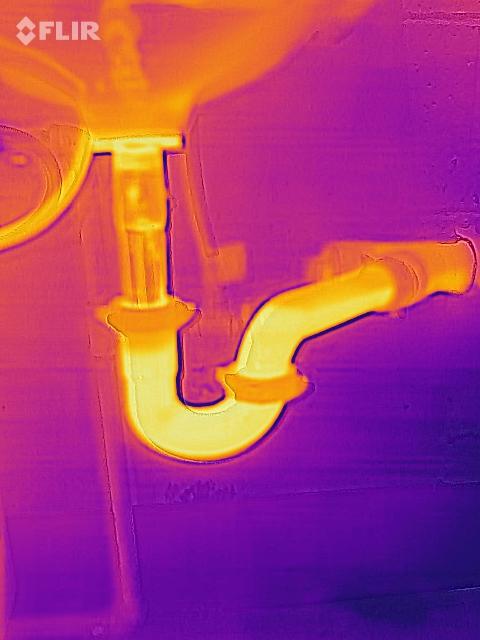
Plumbing leaks behind walls
The IR camera can be used to locate water line leaks behind walls. Water leaks are hard to trace. You may identify an area that is wet but where is it coming from. The IR tool can help you determine where the leak is coming from. I recall an inspection I performed for a fifth wheel located at Camping World. When the water pump was on. A leak occurred at the nose of the fifth wheel. The IR tool was very useful in tracing the leak back to the source. The water was coming from a separated line in behind a wall that was pierced by a staple holding the carpet in place.
Air leakage and Heat loss
It very important to make sure your RV is sealed to prevent air leakage. The IR camera is excellent for discovering air leakage around windows. Because the IR camera shows differences in heat signatures for a given area, it is important to set up the testing conditions such that the temperature difference between the interior of the RV and the air outside is as large as possible. The peaks of the heating and cooling seasons for any region are generally optimal times to gather thermal imaging data since heat or air conditioning can be run in order to maximize the temperature difference. Achieving a 15° to the 20º difference in temperature is ideal. The heat or air conditioning should then be turned off for the inspection. The test can help you make changes to your RV to help regulate air loss in order to conserve energy.
Conclusion
Although infrared thermal imaging is a far better diagnostic tool than the naked eye, it does not guarantee 100% accuracy. The tool is just an extra option to help the RV inspector provide more details to aid customers with the most information before they purchase there RV. The RV inspector is trained to inspect and look for issues that the normal consumer would not notice. Please remember that purchasing an RV is a huge investment and it’s best that you reach out to a certified trained RV inspector for guidance.